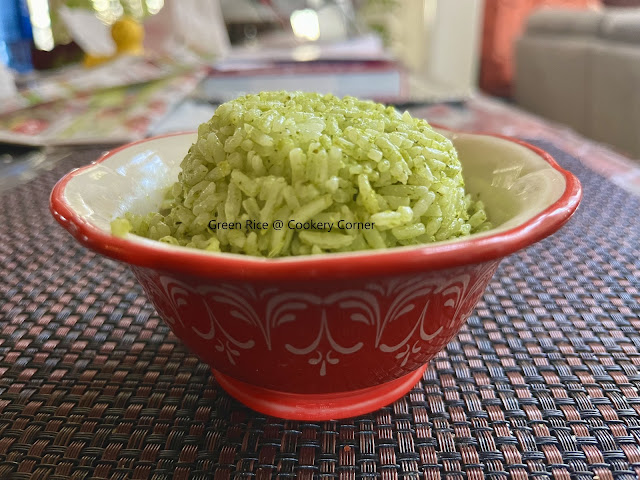
Sunday, February 7, 2010

Enjoying Bajjis amidst all that snow

We got a whole lot of snow on Friday & Saturday and it was upto 30 inches Saturday evening. While I stocked up on groceries & thought we were prepared and all set to stay indoors, we were in for a shock when we woke up Saturday morning to find we had no power or heat. It was about 8 hrs before we got both back and until then it was quite worrying. We couldn't even go to any of our friends' home (who had power) because the roads were far from clean and were pretty dangerous to drive in. The shovelling was back breaking since it was kind of heavy, icy snow as opposed to the light powdery ones we got the previous few times. This is our second major storm for this winter and as much as it looks beautiful the work involved and the potential danger (esp when we lose power and therefore heating) makes me dread snow and want nothing more to do with it.

Here are some pictures of our neighbourhood...


Since my dad always makes bajjis when it rains, we made spicy milagai (chilli) bajjis during this snowstorm :) - spicy chilli bajjis with hot ginger tea is sure to warm us up in any weather. The following batter and method can be used to make bajjis using different vegetables such as sliced potatoes, sliced vazhakai/raw plantain, cauliflower florets, sliced onions (my favorite) etc. the possibilities are endless.

BAJJI


Ingredients:
For the batter

Besan/Kadalai maavu - 1/2 cup
Rice Flour/Arisi maavu - 1/4 cupMaida/All purpose flour - 2 tbsp
Idli/Dosa batter - 2 tbsp
Chilli powder - 1 to 1.5 tsp
Asafoetida - a pinch
Salt - 1.5 tsp (or to taste)
Water - 1 cup (approx)

For the Bajjis:
Light green Anaheim Peppers, Onions, Raw Plantains, Potatoes, Cauliflower etc.
Oil - to deep fry


Method:
1) In a bowl, blend together the ingredients listed under 'for the batter' and make sure it's not too thick or thin.
2) Heat oil until it starts smoking a bit.
3) Dip the veggies in the batter, making sure that it encases the veggies fully and gently slide them into the oil and deep fry until golden. Drain on paper towels and serve plain or with some coconut chutney.

Monday, February 1, 2010

Veggie Burger

Hiya folks... I know I've been away for much too long a time and it was totally unplanned. I had no intentions of taking a break but things just unfolded and soon I realized that it has been more than a month since I posted anything. Things have been super hectic at home and work and to top it there has been a lot of cold, cough, ear infections etc. going around at home so it has been tiring to say the least. I will try my best to post more regularly but if I am slacking yet again, you will know why :)

Coming to the recipe I have on hand.. this a hot new favorite at our home and is healthy too - a veggie burger.
What I love about this burger, besides it being absolutely delicious, filling & easy to make, is the fact that it has crunchy bits of vegetables that lends a yummy texture and can be frozen for later. We had these stuffed in pita bread (store-bought jalapeno cheddar pita) with some cucumbers, tomatoes, carrots & a touch of mayonnaise & ketchup - yummy! These can be served like traditional veggie burgers or even eaten as is like cutlets, if you please.

VEGGIE BURGER


Ingredients:

Blackbeans (cooked) - about 1.5 cups, coarsely mashed (you can use canned instead)
Potatoes -2, cooked & peeled (I microwaved for 8 mins with some water)
Quick cooking oats - half cup
Onion - half, chopped finely
Garlic - 4 cloves, chopped finely
Carrot - 1, big, chopped finely
Broccoli stalks - half cup, chopped finely
Bell peppers (red & green) - 1/3 cup, finely chopped
Bread crumbs - 1/4 cup (I run the end slices in a mixie and store them so used that)
Chilli powder - 1.5 tsp
Sambar powder - 1.5 tsp
Cumin powder - 1 tsp
Celery salt, Oregano, turmeric powder - 1/4 tsp each
Salt - to taste
Coriander leaves - 2 tbsp, chopped finely
Oil - 1 tbsp + more to cook the burgers (I used Extra virgin olive oil)
Method:
1) Heat oil in a pan and add onions, garlic and saute until translucent. Next add the green & red bell peppers, carrots, broccoli stalks and saute till crisp tender.
2) Add salt, chilli powder, cumin powder, sambar powder, celery salt, oregano & turmeric powder and let this cook for a few more minutes before adding in the mashed potatoes, oats, coarsely mashed black beans & bread crumbs. Switch off the stove.
3) Stir in the chopped coriander leaves and combine everything together and divide to form patties - make sure they are thick enough so they don't fall apart. Wrap them individually in cling wrap and refrigerate for an hour before cooking.

4) I froze some of these for later and pan-fried the rest on the tawa with some oil and assembled them in the pita bread.

Friday, December 25, 2009

Vazhaipoo Vadai

I consider myself lucky to have vazhaipoo a.k.a plaintain/banana flower readily available at the Asian grocery store we visit... however it is not something i've bought often mainly because it requires quite a bit of time and labor to seprate the flowers & the stamen from each. But my mom can process a vazhaipoo in no time and doesn't think it's such a big chore at all so we've been buying this rather regularly now that she's here. At home, vazhaipoo vadai or paruppu usli are amongst the favorite preparations. Amma makes two kinds of vadais - one with urad dhal (ulundhu) not unlike the medhu vadai and the other is this... with channa dhal/kadalai paruppu. The former yields a softer vadai while this is the crunchy counterpart - both delicious.

VAZHAIPOO VADAI


Ingredients:

Vazhaipoo - half of a big one
Channa dhal - half cup (soak for 2 to 3 hours)
Dried Red Chillies - 2 to 3
Ginger - half inch piece, minced
Asafoetida - a big pinch
Onion - half of a big one, chopped finely
Curry leaves - 1 stalk, chopped
Coriander leaves - 2 tbsp, chopped
Salt - to taste
Oil - to deep fry

Method:
1) Prepare the vazhaipoo by peeling out the florets and removing the stamen (click here for detailed steps on how to do this). Chop the vazhaipoo into small pieces and put them in bowl of water to which a tbsp of yogurt has been mixed in. This will help maintain the colour of the vazhaipoo without blackening them.

2) Heat a pan and drain fistfuls of the vazhaipoo (from the above diluted yogurt water) and add to it with a pinch of salt and allow to cook for about 10-15 mins or until all the water has evaporated. This should be dry.

2) Grind the soaked the channa dhal & red chillies to a coarse texture (not too chunky either or it won't hold together well).

3) To the channa dhal, add the cooked vazhaipoo, chopped onions, curry leaves, coriander leaves, ginger, hing & salt to taste. Mix thoroughly.

4) Heat oil (to deep fry) in a pan on medium and when hot enough, make small vadais (flattened slightly) and deep fry till golden brown. Make sure the oil is not too hot or the insides won't cook through. Drain on a paper towel & serve.

Tuesday, December 22, 2009

Broccoli Kootu

This recipe is from my friend Latha and what I love about it is that it requires no grinding & no chopping either if you use the frozen one and incorporates broccoli in a very yummy, subtle way that it makes for a nice variation to make even for those who are not crazy about this veggie. Ever since I started making Roasted Broccoli, it has converted my once broccoli hating husband to one who actually buys a big bunch every time he goes shopping. My daughter has even gone on to declare it as her favorite veggie - so now I incorporate this in many more ways in our daily cooking.

BROCCOLI KOOTU


Ingredients:
Broccoli (Chopped) - 1 box (10 oz)
Mung dhal (yellow split) / paasiparuppu - 1/3 cup
Sambar powder (I use Shakthi) - 1 to 2 tsp
Coriander powder - half tsp
Turmeric powder - half tsp
Asafoetida (hing) - a small pinch
Salt - 2 tsp
Shredded Coconut - 1 to 2 tbsp
Cumin seeds - 1 tsp

Seasoning:
Oil - 1 tsp
Mustard seeds - half tsp
Urad dhal - half tsp
Curry leaves - few
Red chillies - 1, broken (optional)
Onion - 1 small, chopped finely
Garlic - 1 clove, minced (optional)

Method:
1) In a deep pan, saute the mung dhal for a few minutes (it shouldn't change colour). Wash it once and return to the stove, then add 2 cups of water, hing, turmeric & 1 tsp of salt. Once it boils, reduce the flame to a simmer, cover and allow to cool.

2) Meanwhile, microwave the frozen broccoli for 5 minutes. When the dhal is cooked about 75% and is quite soft, add the broccoli into the mix followed by the cumin seeds, sambar & coriander powders & remaining salt. Cover and allow to cook till both, dhal & broccoli are cooked fully.

3) In a separate pan, heat oil and season with mustard seeds, urad dhal, curry leaves & broken red chillies. Add the chopped onions & garlic and a bit of salt. Allow this to cook until it softens & browns a bit.

4) Add the onion-seasoning mix to the broccoli-dhal mix and stir in the coconut. Switch of the stove... and allow to rest covered for about 5 to 10 minutes - kootu is ready and tastes real good with rice.


We had nearly 2 feet of snow over the weekend and while it was (and still is to an extent) breathtaking to look at, the clean up was a lot of effort. I leave you with some pictures...

Friday, December 11, 2009

Choco-Toffee Crunch Cookies

I you are looking for crispy cookies studded with nuts, toffee bits and chocolate chips then this recipe is perfect. It was very satisfying and retained it's crunch for several days and was just great dipped in milk or plain. Making cookies with my daughter is always a pleasurable activity and she particularly loves chocolate chip cookies so I wanted to try this out with bits of toffee as well. The recipe below makes a LOT of cookies so I would recommend halving it if you want around 24 cookies.

CHOCO-TOFFEE CRUNCH COOKIES


Ingredients: (makes 4 dozen cookies)

Oats - half cup (I used old fashioned, plain)
All purpose Flour - 2.25 cup
Baking powder - 1 tsp
Baking soda - 1 tsp
Salt - 1/4 tsp
Butter (unsalted) - 2 sticks (at room temperature)
Light Brown Sugar - 1 cup
Sugar - 1 cup
Eggs - 2
Vanilla - 1 tsp
English Toffee Bars (e.g. Heath/Skor) - abt 4 oz (chopped into small bits)
Walnuts - about 1 cup, chopped & lightly toasted
Semi sweet chocolate chips - 1 cup

Method:
1) Preheat oven to 325 degrees F & line baking sheets with parchment paper.
2) Run oats in a food processor and combine with flour, baking powder, soda & salt using a whisk.
3) Beat butter and sugars (white & brown) till fluffy, then beat in eggs and vanilla.
4) Add flour mixture and stir just till blended.
5) Stir in tofee bits, walnuts, choc chips.
6) Drop cookie by rounded tablespoons and bake for 13 to 15 mins. Cool for 5 mins in pan before removing them.

Monday, December 7, 2009

Pad Thai

I had made several versions of pad thai earlier but nothing gave as good results as this and I chanced upon this method and video at DelhiBelle's blog. Since then, I've made this quite a few times and it has always been very enjoyable - thanks DB. I rarely order Pad Thai in restaurants these days because some seem to have a very strong, fishy smell and it is such a turn off - so I just stick with my home-made version. A very useful tip I got from her blog was to do the frying in batches that will serve 1 to 2 at a time - this way, the noodles are fried evenly and do not get soggy.

PAD THAI (Vegetarian) - serves 4


Ingredients:

For the Sauce:
Tamarind extract - 1 cup (soak tamarind in water and extract juice)
Soy sauce -2 tbsp
Jaggery - about 1 to 2 tbsp (or to taste)
Salt - to taste

Method:

Combine the above in a pan and allow to boil together, then simmer until it thickens a bit. Keep aside to use when frying the noodles.

For the Noodles:
Flat rice noodles (used for pad thai) - about 100 to 150 gms
Tofu - 2 cups, cubed and pan fried with a wee bit of oil & a sprinkle of salt
Bean Sprouts - 1 cup
Mixed shredded veggies e.g carrots, cabbage, spinach (optional), shredded - 1 cup total
Garlic chives - to taste (I didn't have this so used spring onions)
Garlic - 1 tbsp, minced
Shallots - 4 tbsp, chopped
Eggs - 3, beaten with a bit of salt & pepper
Red Chilli Flakes - 1 tbsp or more to taste
Dry roasted peanuts - 1/4 cup or so, to taste, crushed
Oil - 3 to 4 tbsp
Salt - to taste
Lemon wedges - to serve
Method: (do the following in 2 batches to serve 3 to 4 pple)
1) Soak the pad thai noodles in some warm water for about 30 minutes or so (or follow package directions). Ensure they are not too soft or they will turn soggy when fried.
2) Heat about 1.5 tbsp of oil in a big wok and add half the garlic, shallots and red chilli flakes, then add in half cup of the veggies using and stir fry on high heat till tender crisp. Add a bit of salt when doing this.
3) Next add about a cup of the pan fried tofu (cut into cubes) and the half of the softened noodles (drained completely). Stir fry this with a tbsp of water, if necessary, until it is soft.
4) Now add half of the beaten egg mixture and continue cooking and stirring until the eggs get scrambled and cooked along with the noodles. The pan should be really hot.
5) Now add half of the bean sprouts & about 3 tbsp of the sauce (can be adjusted after tasting) and continue to stir fry.
6) Finally add the chives/spring onions & the crushed peanuts before removing the pad thai off the flame. Serve with lemon wedges & more chilli flakes if desired for a delicious pad thai.

Tuesday, December 1, 2009

Bread Pudding

This may not be a great looking dessert but it's definitely a simple and comforting one and a great way to use leftover, dried up, hard, stale bread (which is what I had after making some paninis) . The cinnamon and vanilla flavours with the not overly sweet milk mixture combines to form a yummy dessert and biting into the raisins is such a sweet surprise

BREAD PUDDING w/ RAISINS


Ingredients:
Half of a sour dough loaf - cut into cubes (about 6 to 7 cups)
Eggs - 4 (I replaced 2 with half cup egg beaters)
Milk - 3 cups
Sugar - 3/4 cup
Cinnamon - 1 tsp

Vanilla - 1 tsp
Salt - half tsp

Raisins - about half cup
Butter, melted - 3 tbsp + half tbsp to grease pan


Method:
1) Toss together bread, raisins, cinnamon & melted butter.


2) Grease an oven proof (about 2.5 quart) casserole dish with half tbsp of melted butter and put the bread-raisin mixture in.

3) Heat the milk in a saucepan (shouldn't boil). Whisk together eggs, sugar & vanilla. Then add milk and whisk again. Pour this gradually over the bread mixture.

4) Slightly push down the bread on the top to dunk it slightly in the milk mixture.

5) Bake in a preheated 375F oven for about 30 minutes or until a knife inserted comes out clean.


Serve warm with a scoop of vanilla icecream and it also tastes good eaten cold by itself.

Sunday, November 29, 2009

Mixed Berry Jam

I was cleaning out my freezer recently and found a couple bags of berries - strawberries, raspberries & blueberries to be precise. I freeze these when we get them in abundance & typically use them to whip up smoothies... But now that the cold weather is upon us, smoothies are the last thing on my mind and so I decided to make a jam using them instead. It came together really easily and now i look forward to my breakfast of toasted whole wheat bread, jam & scrambled egg with a mug of ovaltine/boost. Btw, I owe the colour to the addition of blueberries - gave it a nice, deep & intense look.

MIXED BERRY JAM


Ingredients:

Strawberries - about 1.5 cups, chopped
Raspberries - about half cup
Blueberries - about half cup
Apple - half, peeled, cored & chopped into small cubes
Sugar - 1.5 cups (adjust based on sweetness of fruit)

Method:
1) In a fairly deep pot, combine the strawberries, raspberries & sugar and put it on the stove on medium heat until it comes to a boil.

2) Add the chopped apple & blueberries and continue boiling the mixture for about 20 minutes or so, stirring often until it reaches 220F on the candy thermometer. I like a bit of texture in the jam so mashed the fruit a bit with the back of the spoon and didn't make it smooth.

Allow to cool completely before storing in an airtight (glass) container/bottle and refrigerating.

NOTE: I would highly recommend buying/using a candy thermometer because it's inexpensive (approx US$4) and takes out a lot of the guesswork about the right time to pull things off the stove.

Wednesday, November 25, 2009

Sunday Supper

I can't remember the last time we all sat down and ate together... it must be atleast 6 months back. Last sunday however, we got an opportunity to do just that and the baby obliged as well and took a small 15 minute power nap during that time. Colder weather always makes me want to use the oven often because baking makes the kitchen and the house in general so much more warm and comforting so we had quite a few baked items.

On the menu were Sweet Potato Fries, Baked Potato Wedges, Hummus, Pita Bread, Roasted Broccoli, Pear Slices & Apple slices - a light and satisfying meal.


Baked Sweet Potato Fries:

Ingredients:
Sweet Potatoes - 3, cut into thick sticks
Chilli powder - to taste
Salt - to taste
Extra Virgin Olive oil - 1 tbsp

1) Preheat oven to 425 F. Toss the sweet potato with the seasonings and oil.

2) Spray a baking sheet lined with aluminium foil and lay the sweet potato as a single layer and bake for about 20 minutes or so, turning them over once in between until done.

They don't get super crisp but are very tasty and the spiciness from the chilli powder and sweetness of the potato go well together.

HUMMUS

Ingredients:
Garbanzo/Chick peas - 1 (14 oz) can, drained and rinsed well
Garlic cloves - 1 medium or 2 small, peeled
Extra virgin olive oil - 1 to 2 tbsp
Tahini paste - 1 tbsp (I roasted sesame seeds and ground them with olive oil & salt with chilli powder)
Chilli powder - approx 1 tsp
Lemon juice - from half a lemon
Salt - to taste
Water - a few tbsp as required to get the right consistency

Method:
1) Blend together the tahini, garlic, olive oil for a few seconds and then add the drained chickpeas, lemon juice, chilli powder, salt with water as required to make a paste.

This is a very versatile recipe and you can change the ingredients and texture to your preference. It will also be good to add some roasted red peppers or jalapenos for a spicy kick.

Serve with crudites or with toasted pita bread.

Finally, always a good sign at the end of the meal... :)

Wednesday, November 18, 2009

Deepavali 2009 Treats

I know this post is rather late, but better late than never... This Deepavali, with my mother's help, we churned out quite a few savouries and sweets but almost all of them were made in small quantities except for the thenkuzhal. I have this unfortunate luck where if some sweet turns out good and I try to double or triple the quantities the next time, then it usually flops. We made Asoka Halwa, 7 cups burfi, karasev, thenkuzhal , mysore pak (from Lata akka's blog - though mine was not perfect like hers it was still the best mysore pak I've made so far) & jangri (from Raks' blog). I also tried making gulab jamun using milk powder which according to me was a super flop texturewise but my daughter and husband loved the taste.

My mother's recipe for thenkuzhal came out smashingly well and it was crunchy and had the perfect texture. The Jangri was also fairly easy to make, much to our surprise (and thanks to Raks' detailed pictures), that my husband who was initially skeptic and was pushing for badusha instead, couldn't get enough of the jangri and finished the entire thing in 2 days after which he wanted us to make more.... but by then I was sick of seeing copious amounts of sugar and ghee that goes into the making of practically everything and decided to give a few months before our next indulgence.


THENKUZHAL (Murukku)
This is the plain, salted version and if you want to spicy one please check out the recipe for Chaklis.


Ingredients:
Rice Flour (I used store bought) - 2 cups
Urad dhal flour - 1/4 cup (procedure give below)
Cumin seeds - 1 to 2 tsp (based on preference)
Asafoetida powder (hing) - few pinches
Butter (unsalted) - 1 tbsp at room temperature (not melted)
Salt - to taste (I used about 3/4 to 1 tsp)
Water - sufficient amount to bind into a dough
Oil - enough to deep fry


Method:

1) Procedure for Urad Flour: Dry roast about 1/4 cup of whole, skinned (white), urad dhal in a pan until very light brown. Allow to cool and grind to a fine powder. Sieve this urad dhal flour and then measure out the required 1/4 cup flour for this recipe.

2) In a bowl combine the rice flour, urad dhal flour cumin seeds, salt, asafoetida. Then add the butter and mix well. Slowly add water and make into a soft dough. If it's too hard, then it'll be really hard to press out the thenkuzhal and if too soft/watery, it will absorb too much oil.


3) Heat oil in a wide pan, test with a small piece of the dough and if it sizzles and comes right back up then it's ready. Press out the thenkuzhal (you need special equipment for this) directly in the oil, if comfortable or onto a piece of foil or wrap before transferring them into the oil.

4) Fry until the bubbles around the murukku almost disappear but ensure that it doesn't become brown.. it should be an off white. Adjust the temperature of the oil accordingly. Drain on a paper towel and store in an air-tight container when it has cooled down.

----------------------------------------------------------------

JANGRI (south indian jilebis)


Ingredients:
For the dough:
Whole white urad dhal - 1/2 cup, soaked for 2 hours
Orange food colouring - a pinch
Salt - a pinch


Oil - to deep fry

A Ziploc bag

For the Sugar Syrup:

Sugar -1/2 cup
Water - as required to immerse the sugar
Orange colouring - a few pinches
Rose essence - if desired


Method:

1) For the Sugar Syrup: Boil water and sugar for a few minutes until the syrup thickens a bit. Add the orange colour and rose essence and keep this kind of hot and ready for the jangris.

2) For the Jangris: Grind the urad dhal with very little water to a smooth and fluffy dough (I used a wet grinder for this and followed the exact same procedure as for vadais). Add a wee bit of salt and food colouring and mix well.


3) Now spoon this into a ziploc bag and push it all to one of the lower corners and snip of the tip (a small one will do). Heat oil in a wide, but shallow pan - one inch depth of oil is sufficient - on a low flame. Oil should not be smoking hot.


4) Now squeeze the top of the ziploc while making circular motions directly in the oil to form the jangris (I know it sounds complicated but isn't all that bad when you actually give it a go). Please check out raks website for detailed pictures. I practised making a small one on a plate before trying it out in oil.

5) Flip them over and allow to cook on both sides & remove from oil (using chopsticks is recommended so as not to bruise them) and drop them in the hot sugar syrup for about 2 minutes or so before removing them onto a plate.
I would recommend letting them sit for a while before eating because they tasted better with time.